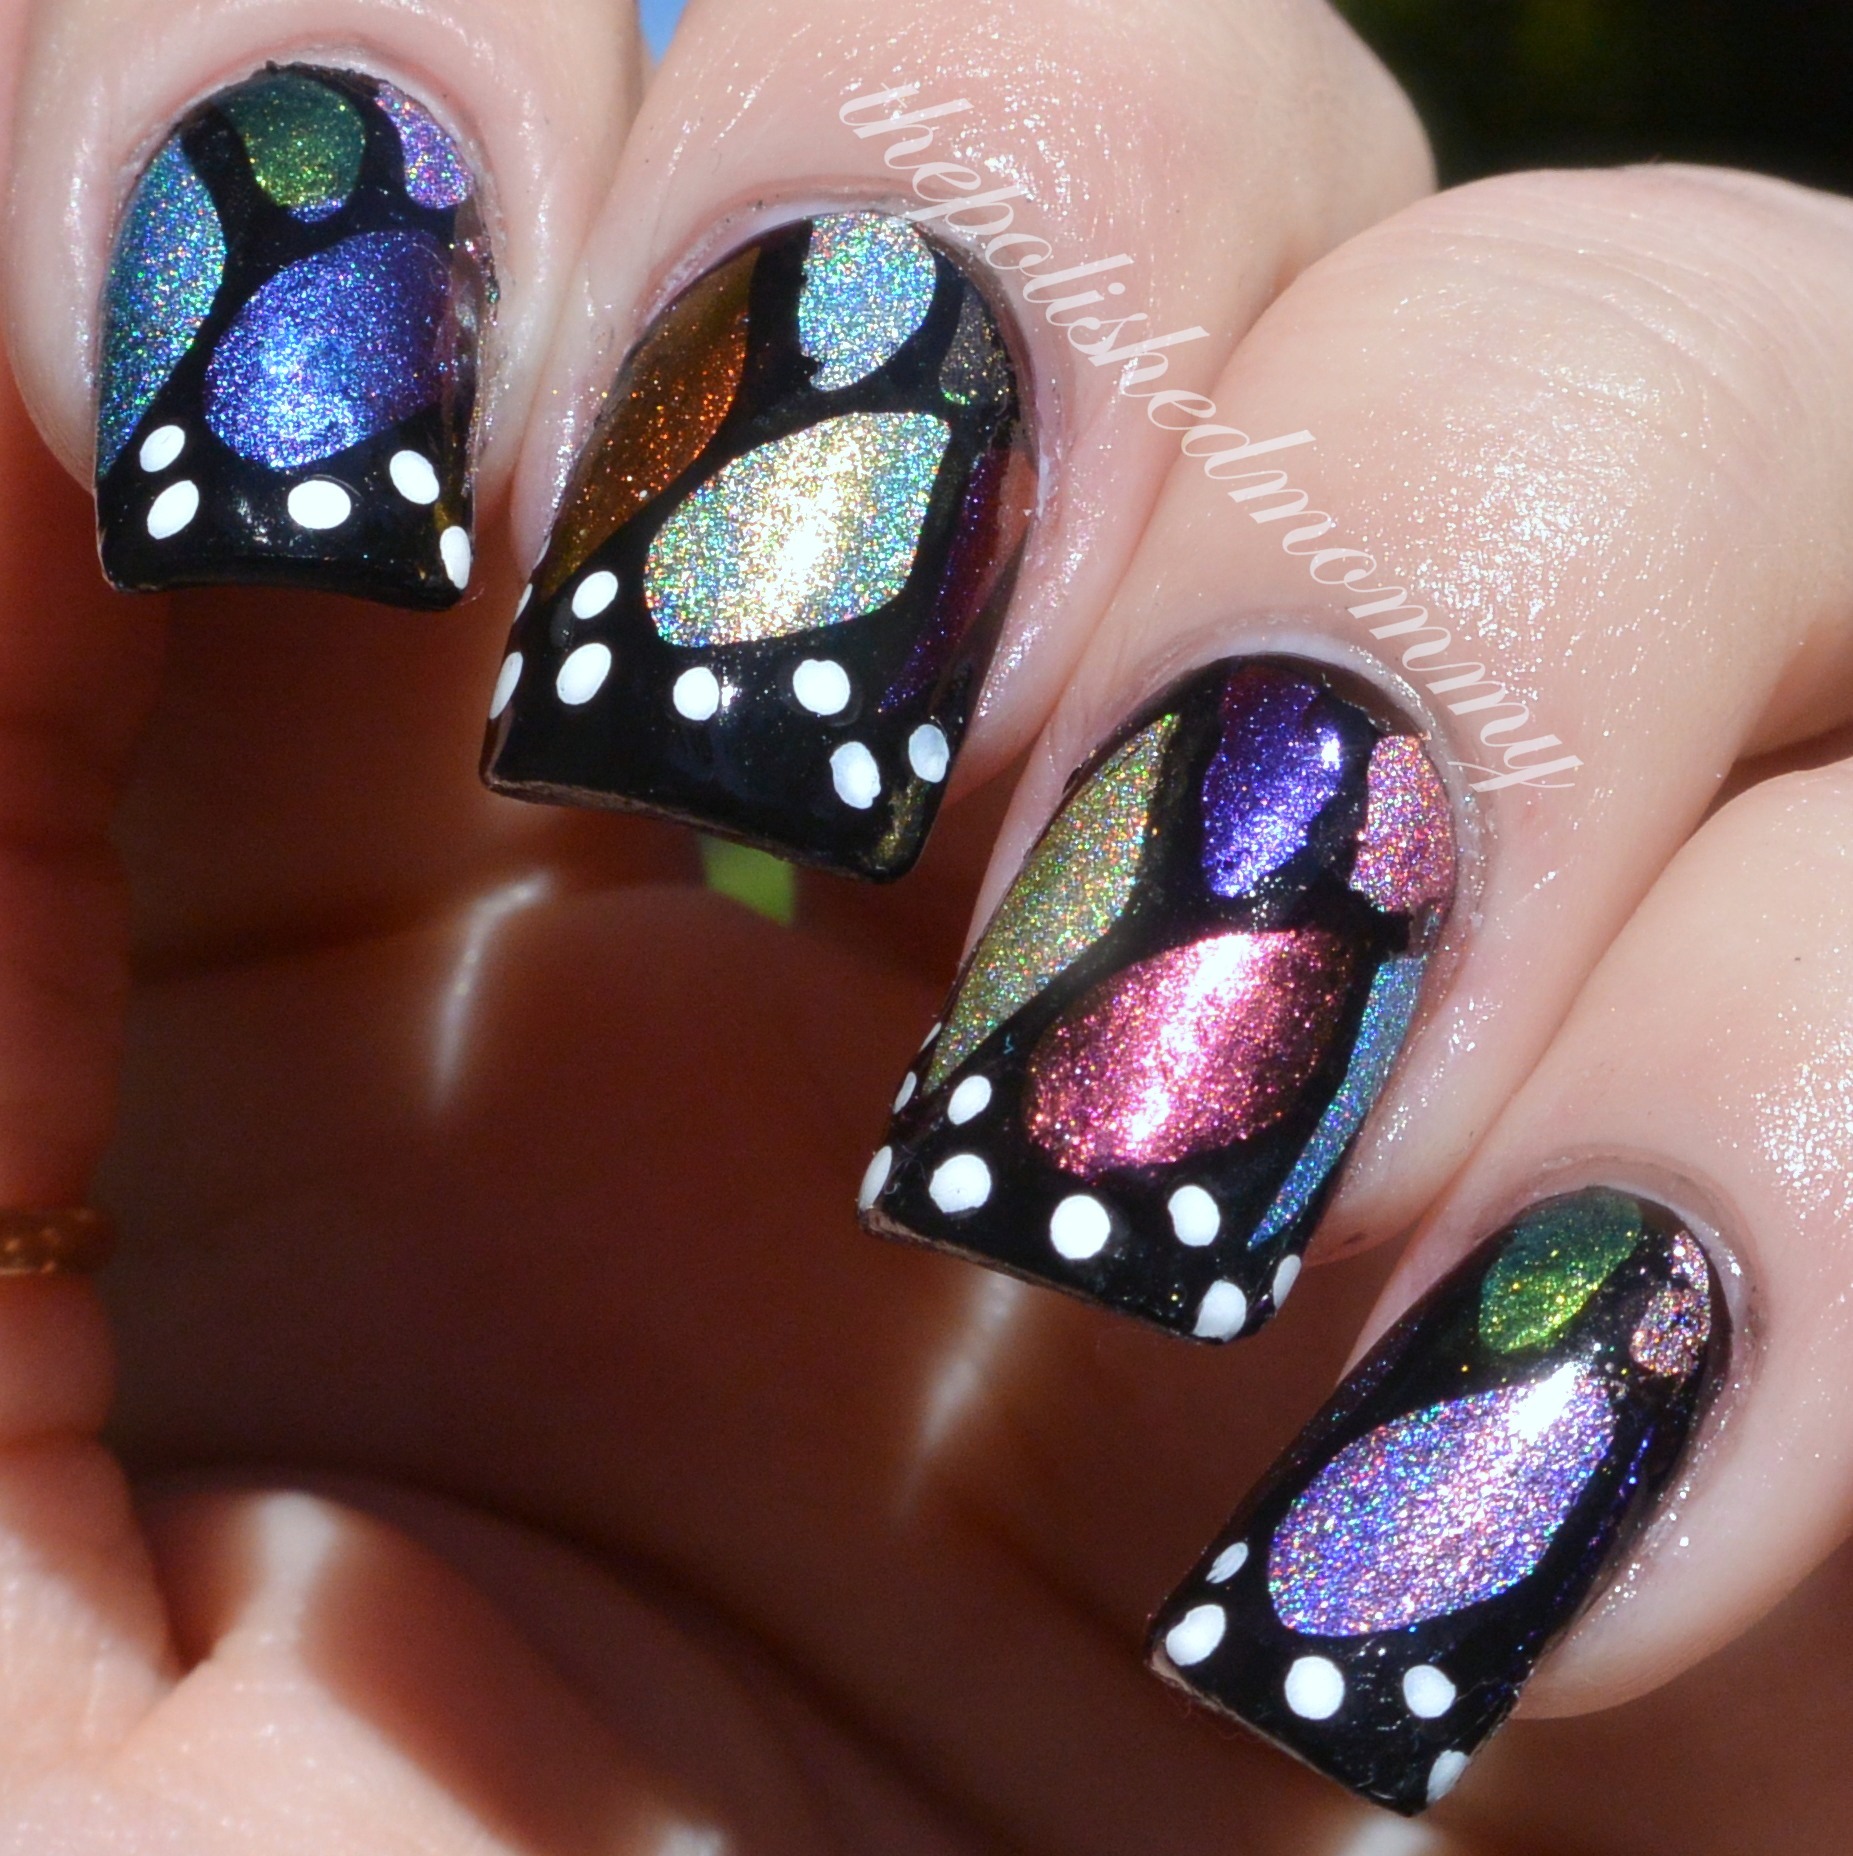
Magical Butterfly Tutorial…
| Affiliate Link |
As promised here is the tutorial on how I created the Magical Butterfly wings from yesterday…
This is similar to the stamping decals I made for my Muppets World Tour Birthday Bash mani, but using a slightly different method. Instead of creating the decal directly on the stamper I used a plastic baggie, this way I could create several at once.
First, you want to get a smooth surface to work on. Plastic wrap or a plastic baggie will work fine. I used a gallon size Ziploc bag, this gave me plenty of space to create enough decals for each nail plus extras.
 1.To start, take a thin top coat (brand/type doesn’t matter, you just don’t want a very thick top coat) and create a rectangle shape (large enough to fit your nail) on the plastic baggie. I created about 15 rectangles. Let the top coat completely dry.
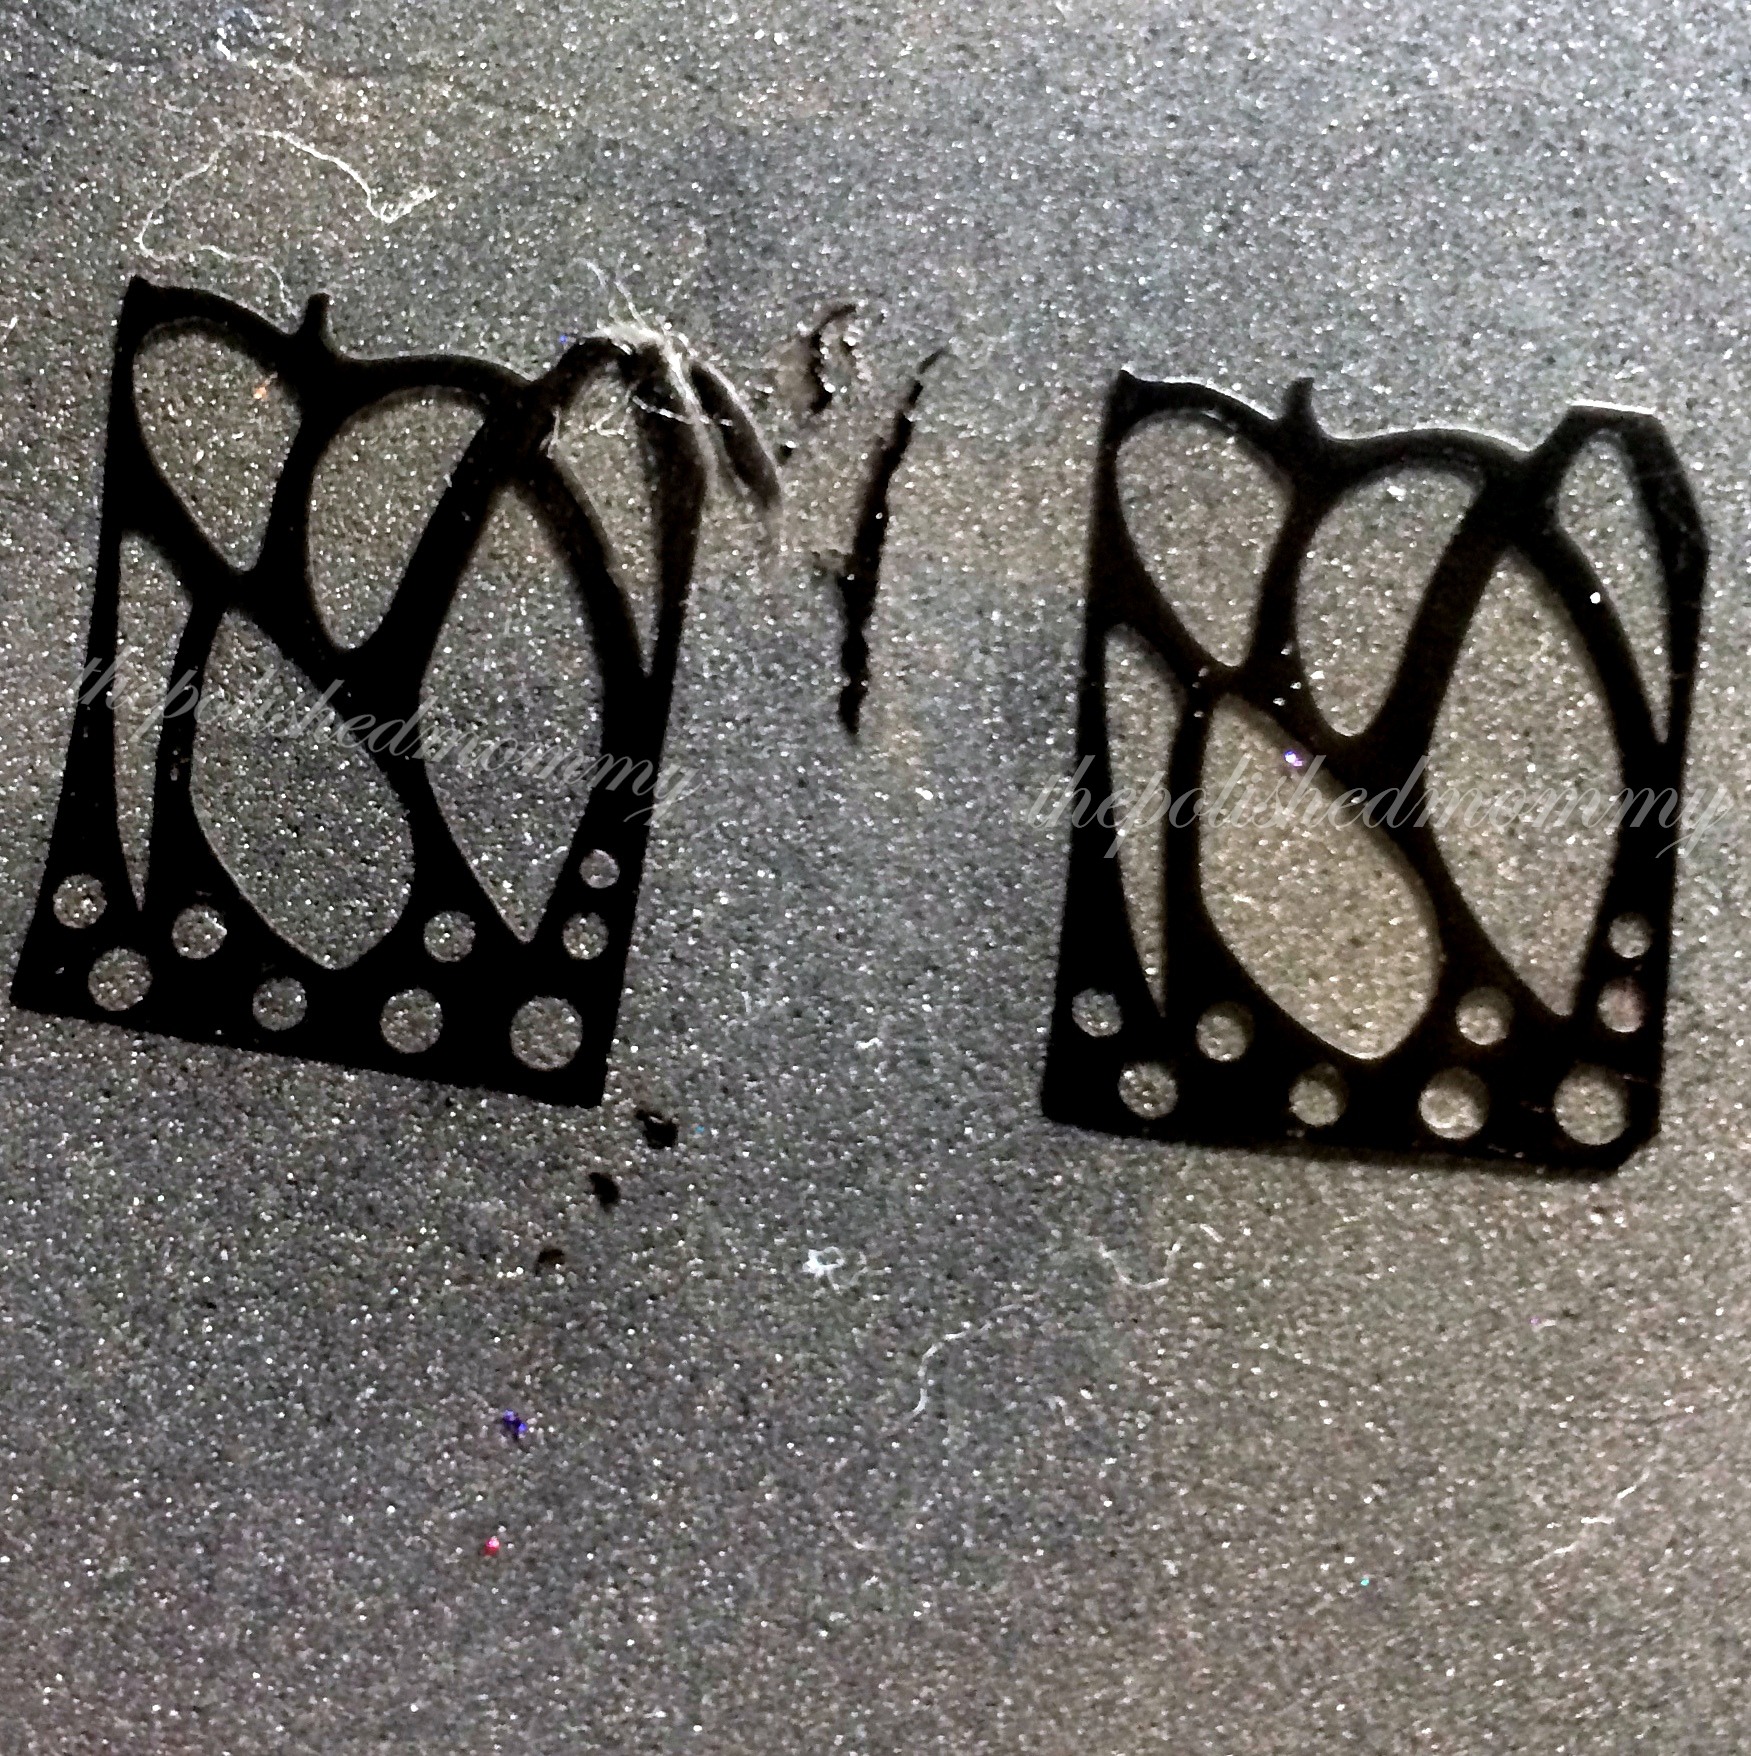 2. Once you’ve chosen your stamp design(BM424), and the polish you want to stamp with, pick up the design on your stamper. Then firmly (but not hard!) roll the design onto the top coat.
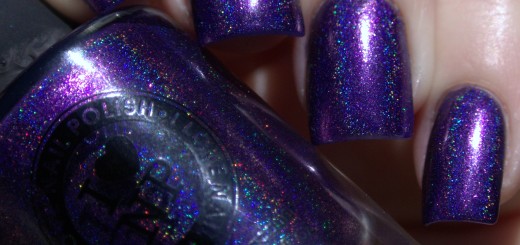
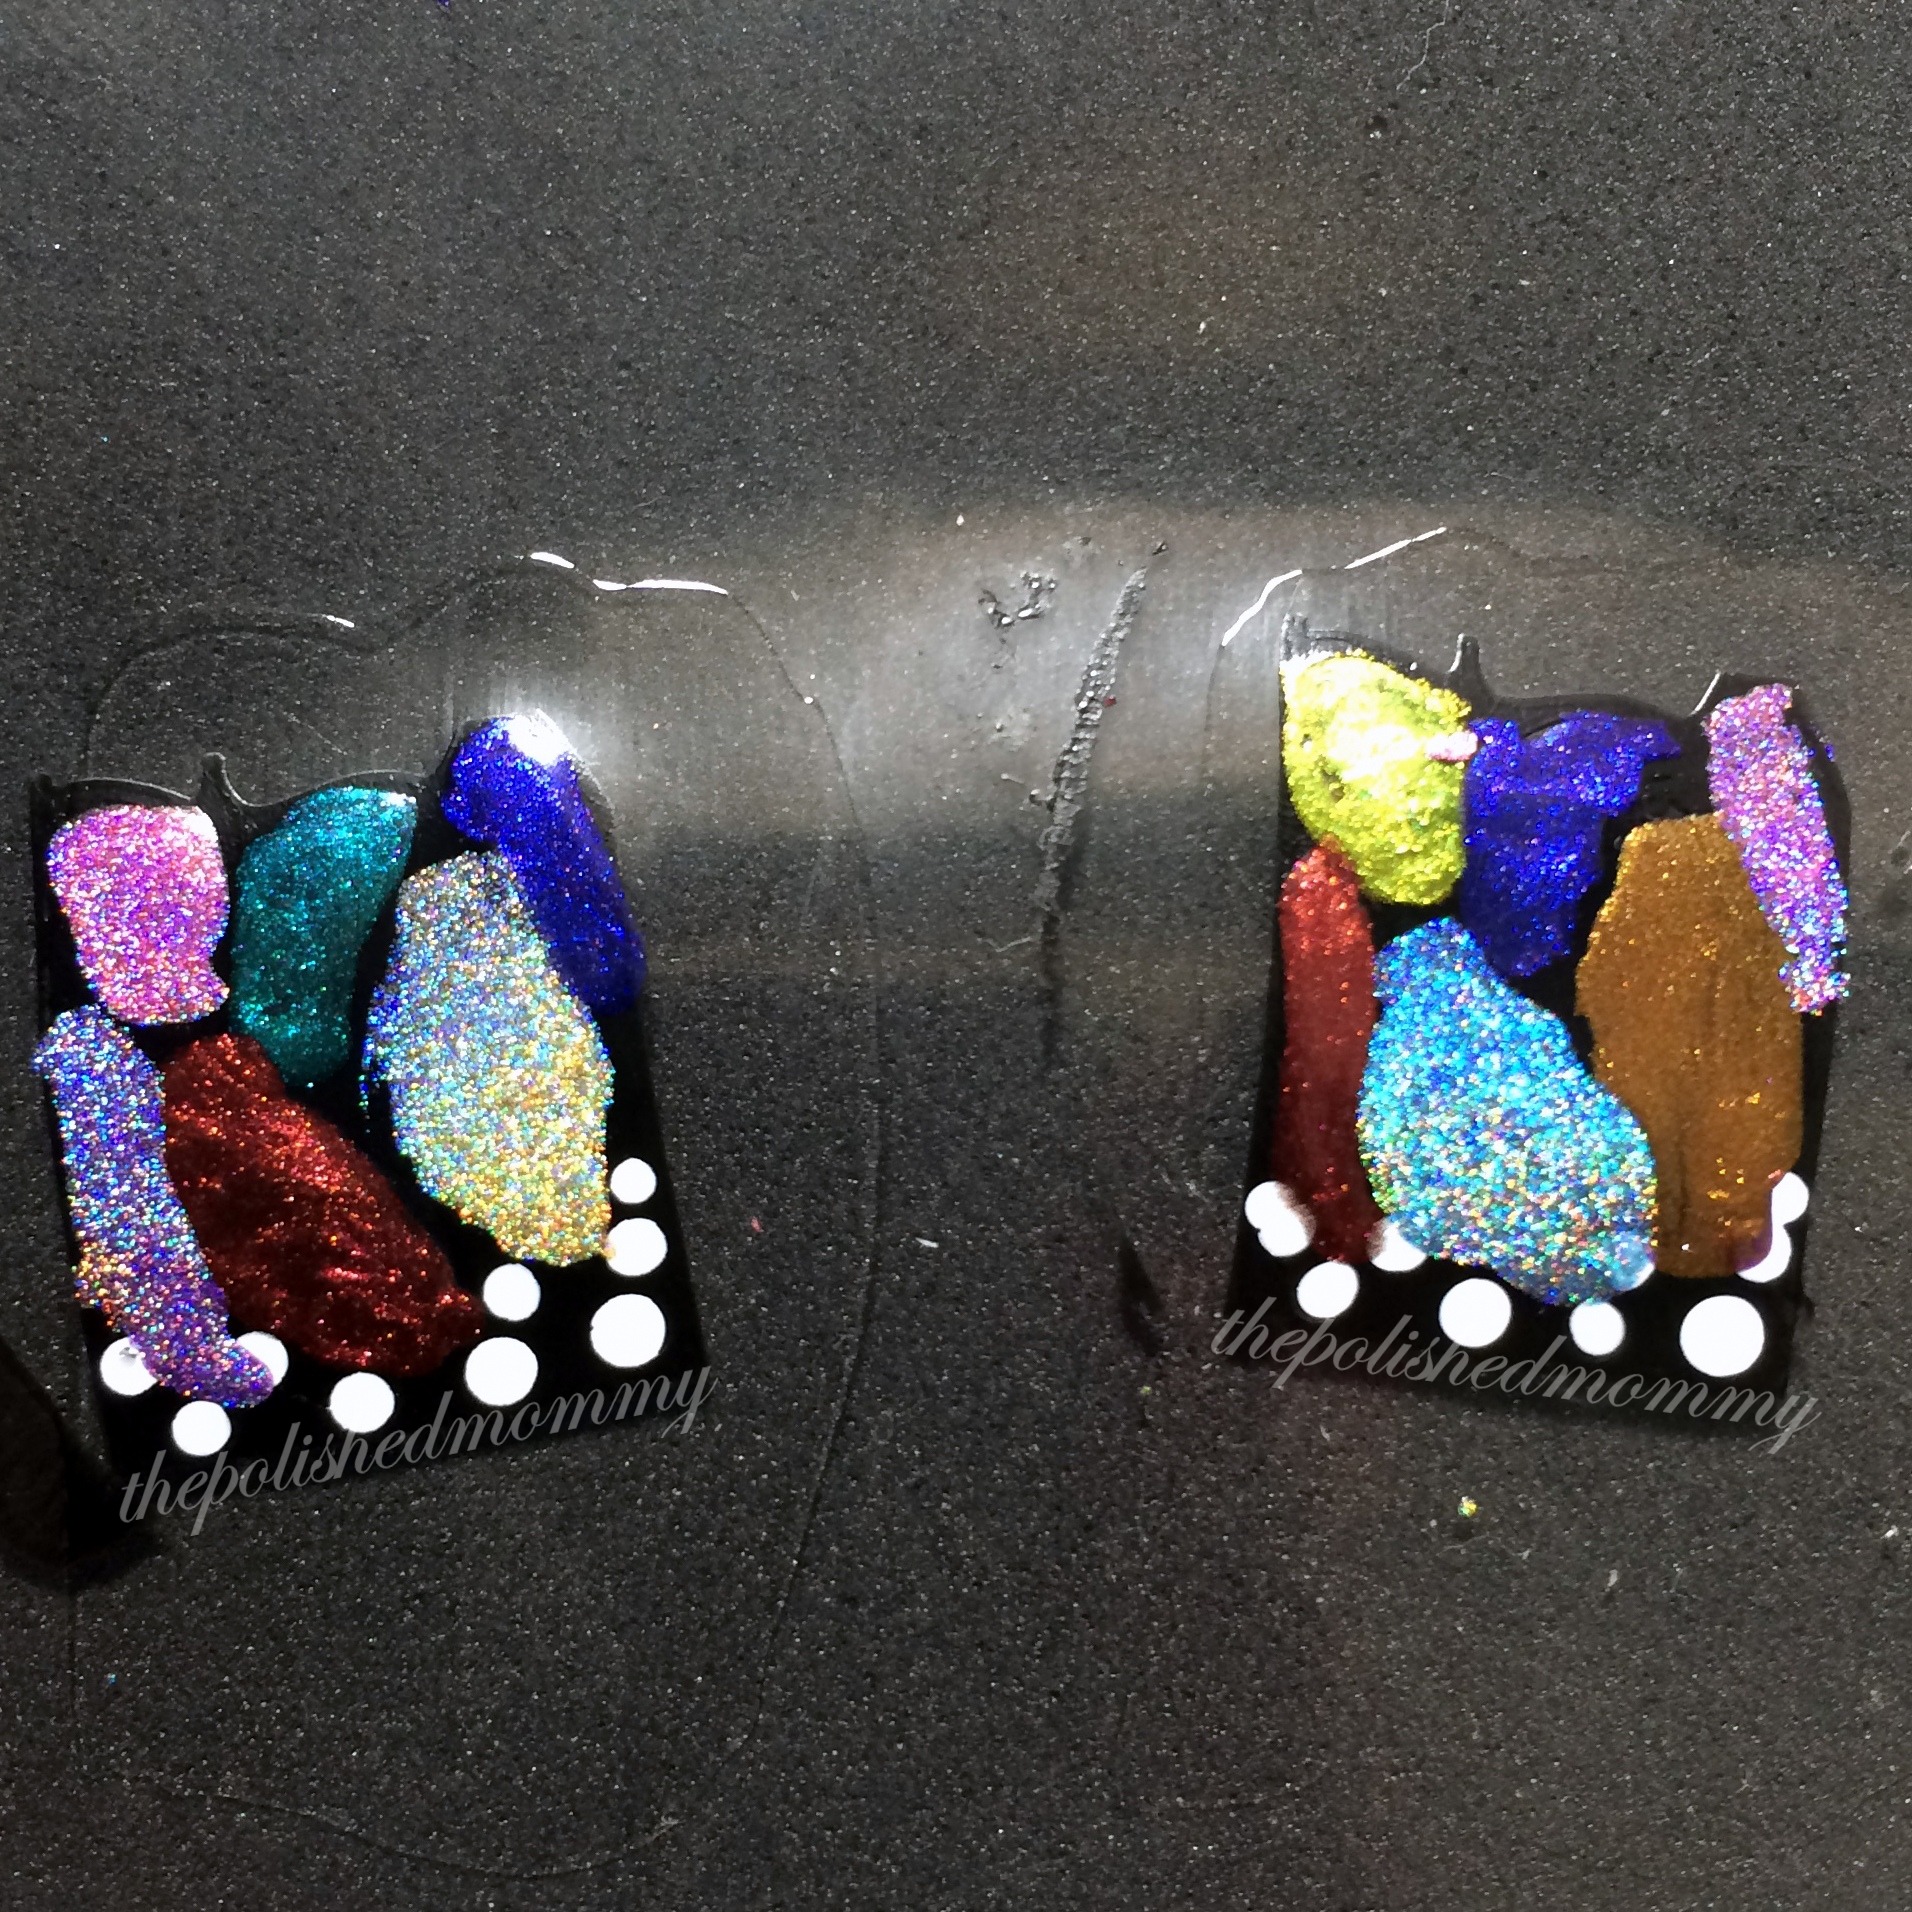 3. Begin to fill in the negative space with the colors of your choosing. I used white acrylic paint with a small dotting tool to fill in the circles, and randomly filled in the larger areas with the entire DL Chameleon collection and 6 of the Color Club Halo Hues ( Cosmic Fate, Eternal Beauty, Miss Bliss, Angel Kiss, Over the Moon, and Kismet). No two decals were the same, but you could make them all the same if you want. Make sure the the entire area is filled in, you can carefully pick up the baggie to see the reversed side (what it will look like once on the nail). Let this fully dry, at least 30 minutes. Trying to remove the decal before it’s completely dry will ruin it.
4. While the decals are drying, paint a base color on your nails. I used FingerPaints Black Expressionism to enhance the multichromes. If you are using a full nail stamp and opaque colors you may be able to skip this step, if you choose.
5. Once the decals are dry take a pair of tweezers and gently lift up one of the corners. Then carefully slide one side of the tweezers down the length of the decal to release it from the plastic baggie.
6. Doing on nail at a time, apply a thin layer of a quick drying top coat and let it set for a few seconds. Then take your decal and smooth it onto the nail. If needed, trim off excess decal using very sharp scissors or cuticle nippers.
7. Apply a final layer of top coat (I prefer Sally Hansen Insta Dri ) and cleanup around the cuticle area using acetone and a small brush.

If you recreate this look I would love to see your results! Feel free to post them on my Facebook page or tag me on Instagram.


2 Responses
[…] Magic Butterfly Tutorial […]
[…] Magic Butterfly Tutorial […]