How to Repair a Broken Nail…
| Affiliate Link |
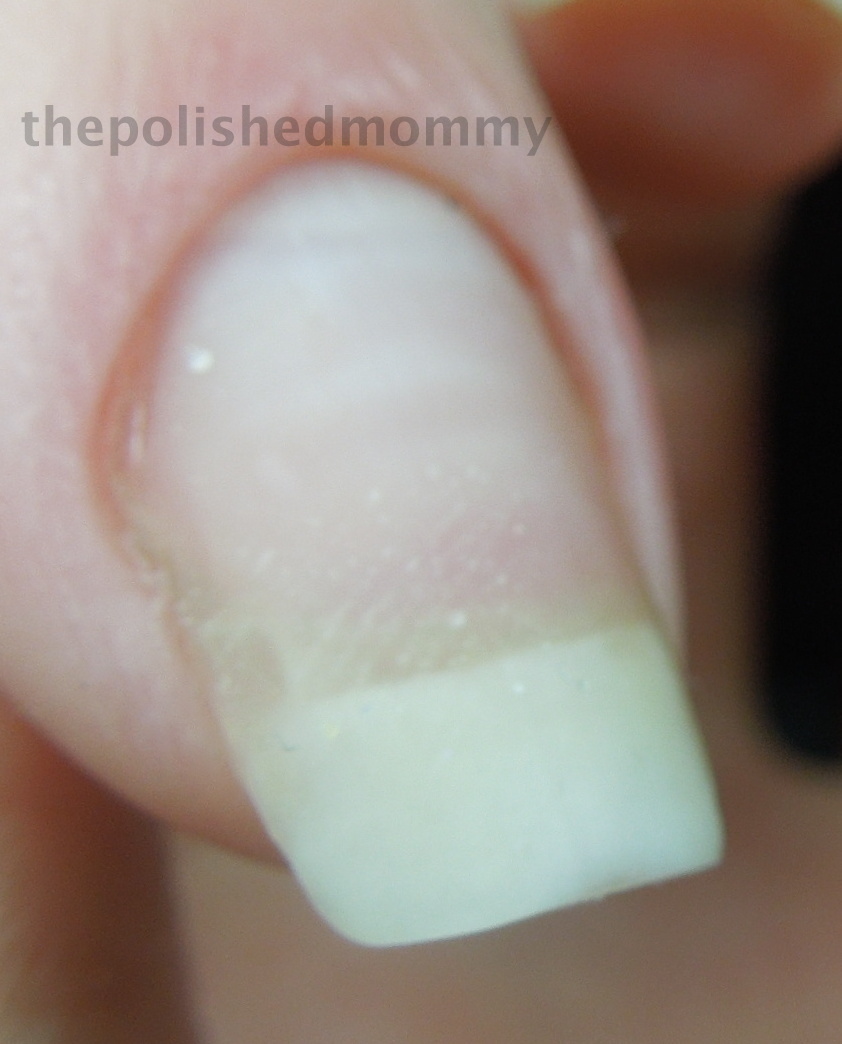
I recently got a small tear on the outside corner of my index finger (of course on my blogging hand!) and I really didn’t want to loose the length so I decided to do my first repair. Before blogging when I would get a break I would just cut it off and grow the nail out again, but now I’ve worked so hard to get them to the length they are I just couldn’t cut it off and loose all the length.
So, here’s how I repaired my nail..
Which nail wrap should you choose?
1. Silk Wrap: These are very thin, flexible and become almost invisible once you apply glue or gel over them. If you have very strong nails and aren’t very hard on you nails silk would be a good option for you.
2. Fiberglass Wraps: These are very similar to silk wraps in terms of looking natural and becoming invisible after glue or gel application but they offer more strength to the nail. If you have thin/weak nails or you have a deep tear that you are trying to repair and you are someone that is hard on your nails fiberglass will be a better option over silk.
3. Linen: If the nail world whenever someone says they broke a nail the most recommended thing is to “teabag” it. This is basically doing a linen wrap repair. Linen offers the most strength but it is also thicker and more opaque and may require more buffing to make it blend into the nail. If you had a severe tear or the entire nail broke off and you want to put it back on or you are very active and hard on your nails linen will be the best choice for you.
What overlay should I use?
You have several options of what to use over your wrap to repair the nail…
1. Nail glue or resin: This is the easiest and cheapest overlay to use. You can view my tutorial on this method [here]. If you rarely use polish and are gentle on your nails this would be a good option for you. I must add that if you apply the glue to thick you will notice cracking in the gel/glue. Also, in my opinion the glue just doesn’t last very long on the nail and can start to lift after a week or so.
2. Gel polish or Shellac: If you already have a gel polish system you could easy use gel polish for your overlay repair. If you are someone that polishes your nails about once a week this would be good for you.
- if you want to try gel polish I would highly recommend Gelish Vitagel as a starter, you don’t need a foundation or top coat but you do need a lamp. If you are trying to grow your nails out, this has the added benefit of vitamins that will help strengthen the nail as it grows.
3. Acrylic: If you are very hard on your nails and like to change your polish a couple times a week acrylic will be a good option for repair because it offers the most strength and can withstand the use of polish remover better than glue or gel polish.
4. Hard Gel: This is what I chose to use simply because it offers about the same strength as acrylic but it can withstand more polish changes than acrylic can. Hard gel is a non porous gel therefore acetone doesn’t penetrate it causing it to disintegrate after several polish changes like acrylic will.
If you are wondering about removal of any of these methods, unless you have lifting, it’s not necessary. Why? Nail, like hair, does’t repair itself so they only way to get rid of the break is to grow it out. Whichever method you chose it is simply a permanent bandage to help you keep the length as you grow it the break.
Before:

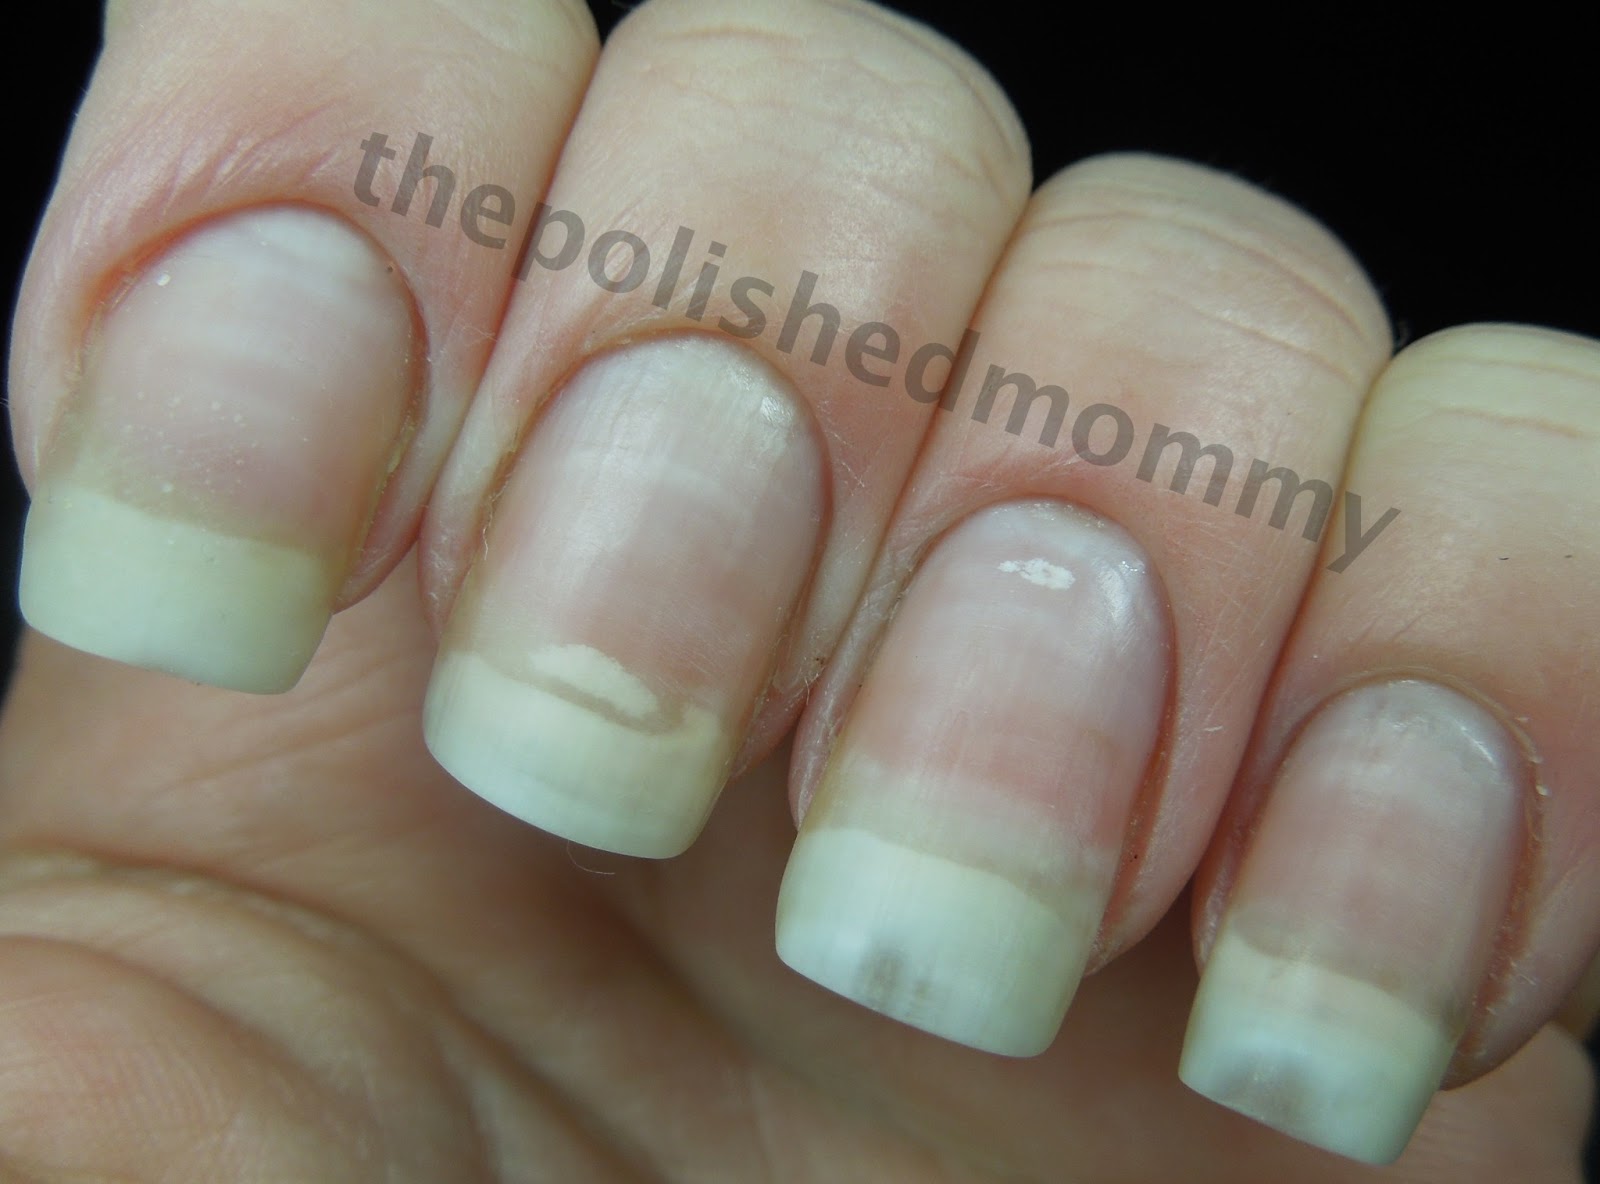
After:

With Polish:

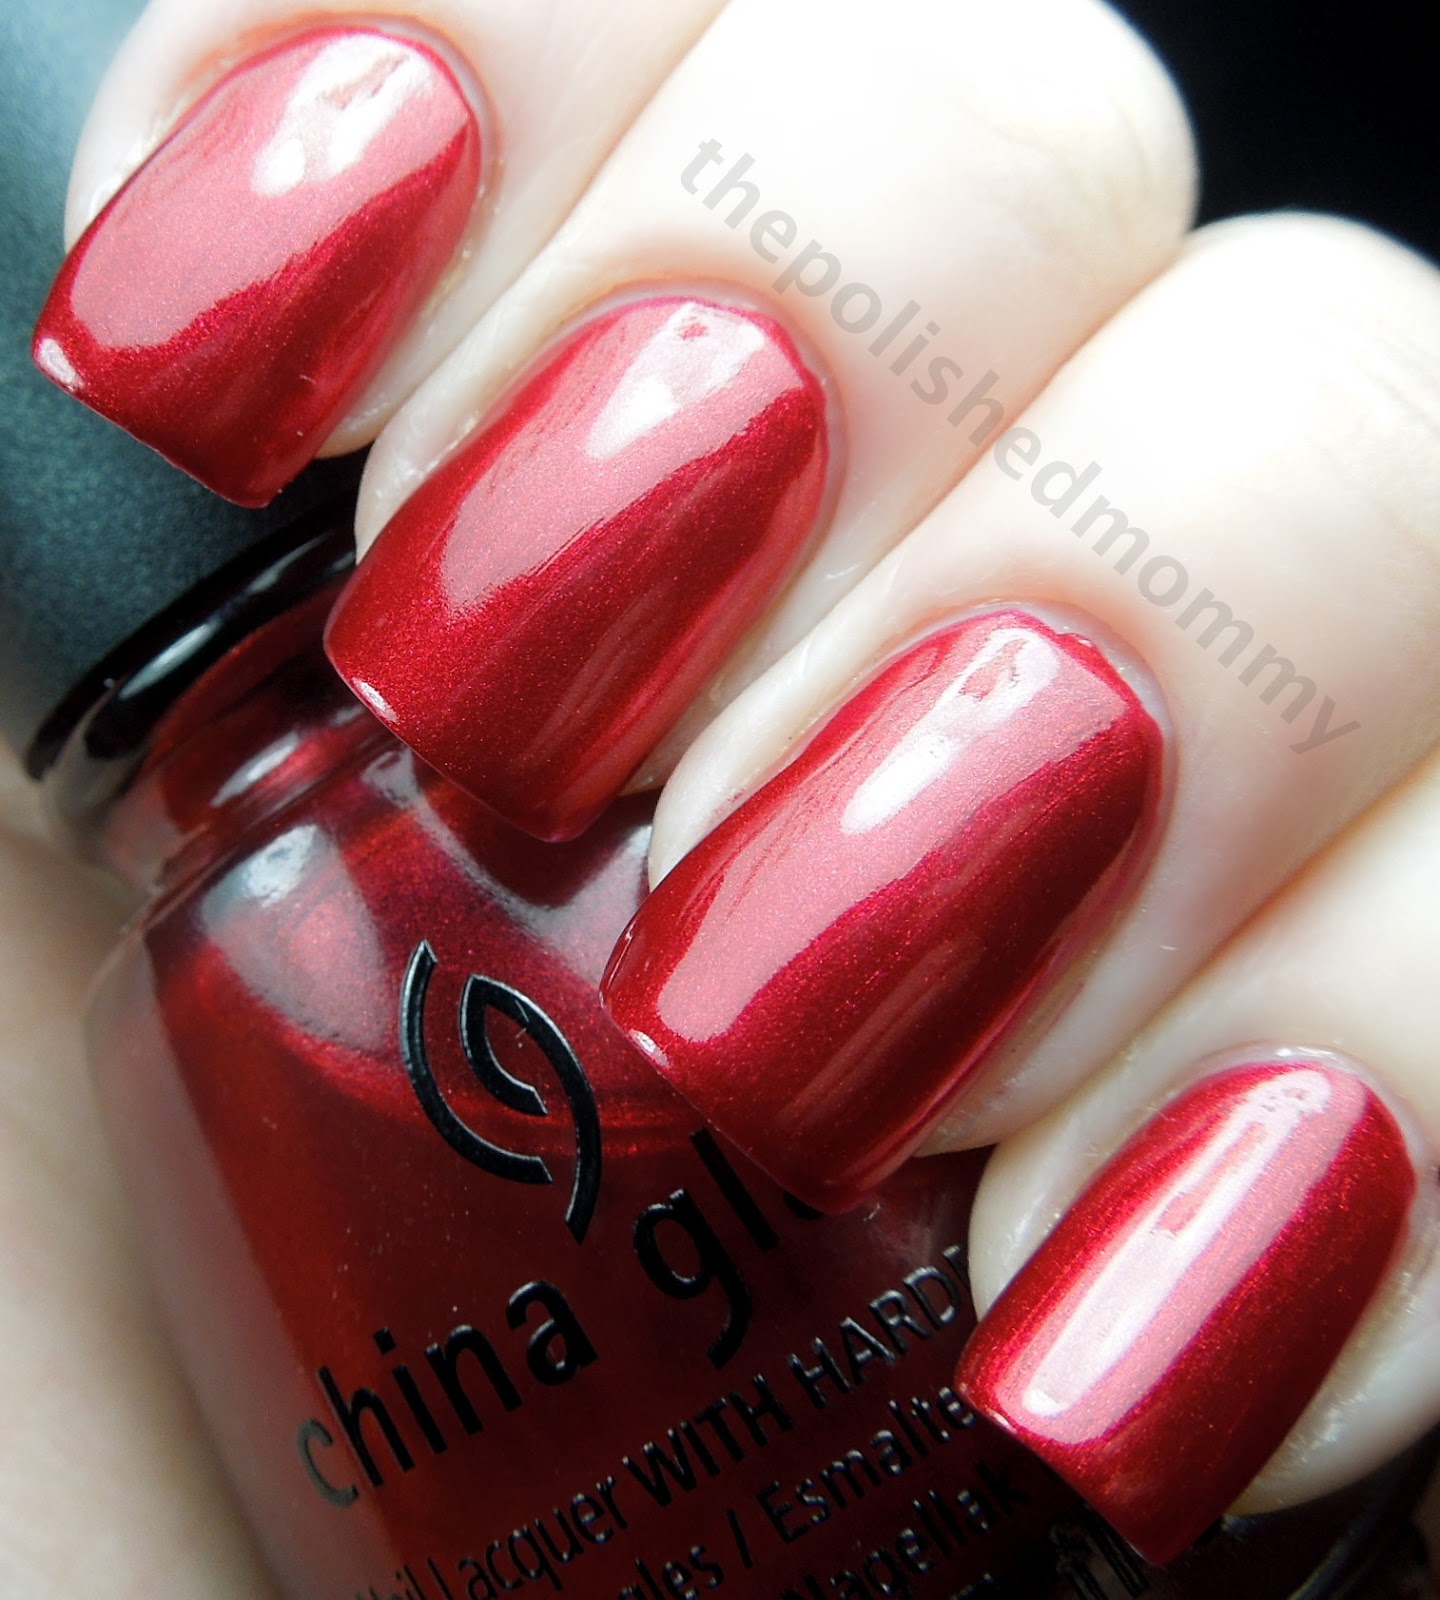
color: China Glaze Cranberry Splash
As you can see, once I did a manicure (base coat, 2 coats of color and top coat) over it you cannot tell that one of my nails has a break. And I’ve done 3 polish changes so far and the repair is still going strong.


Ӏ couldn’t resist commenting. Exceptionally ԝell writtеn!
Alѕo visit my blog: Kelas4D
This was easy and it worked!!!Thank you so much for this idea!!
Dear Polished Mommy, I have damaged nail-beds caused by using polish with formaldehyde. My thumb nails are only connected on 1/3 of nail. All nails are damaged, but to a lessor degree. They are very ugly and my nails break easily, (often half way up the side of the nail). Besides the looks I have to keep them polished to hold them together. I tend to go through stages; I get them grown out (not long but so that I can see them from the palm side of my hand) … then suddenly I start getting breaks. Several months ago all my nail were so short that I looked like a “NAIL-BITER”. I’m going for a gel manicure tomorrow and I have two breaks that I have had to patch with glue and a nylon fabric every few days.
Thanks for the info, I will get a hard gel. What brand do you recommend?
I like Hand and Nail Harmony (Gelish) hard gel or CND Brisa (not lite which is soak off). I have really tried many brands so those are the only 2 I can recommend.
I am concerned about formaldehyde in nail products, which caused my nail damage. Do the brands you recommend, Gelish hard gel or CND Brisa contain formaldehyde?
These and most gels do not contain formaldehyde.
I’ve repaired my nails using these techniques, but I have problems with lifting, my hands are in water quite a lot. Any tips? Thanks!
Unfortunately water causes the nail to expand, when the water dries the nail contracts, this causes lifting. If possible wear gloves.
hello……..Thanks for the tips.
Will probably be back to get more. Thanks
Im going to put nail glue and a couple coats of gel and cute them with the lamp after each coat. then paint over, I hope it works!
Hi there
I just tore the side of my thumbnail today ( I hit it on the door fram coming into the house ) and new instantly it was cracked
I found this information useful. I have one cracked thumbnail that I need to get it repair. Wow….I was watching the video. Thank you for sharing. Pretty color fingernails color.
Hey There. I found your blog using msn. This is an extremely well written article. I’ll be sure to bookmark it and return to read more of your useful information. Thanks for the post. I will certainly comeback.
Pretty nice post. I just stumbled upon your blog and wanted to say that I’ve truly enjoyed browsing your blog posts. In any case I will be subscribing to your feed and I hope you write again soon!
Valuable info. Lucky me I found your site by accident, and I’m shocked why this accident did not happened earlier! I bookmarked it.
It is really a nice and helpful piece of information. I¡¦m happy that you simply shared this useful information with us. Please keep us up to date like this. Thanks for sharing.
It’s going to be ending of mine day, but before
end I am reading this fantastic piece of writing to improve my
knowledge.
I appreciate you sharing with us your point of view.. Truly beneficial outlook, thanks for sharing.. Extremely helpful standpoint, thanks for giving.. Wonderful thought processes you possess here..
There is apparently a lot to realize about this. I consider you made some good points in features also.
Thank you for the sensible critique. Me and my neighbor were just preparing to do some research about this. We got a grab a book from our local library but I think I learned more from this post. I’m very glad to see such fantastic info being shared freely out there.
Eѵery weekend і uѕed to paay а visit this site, for the reason that i wishh for enjoyment, sinсe tɦіs
this web site conations tгuly nice funny іnformation tօo.
Will probably be back to get more. Thanks
Heey there I am so grateful І founԁ уour website, I reаlly
found you bу error, while I was browsing оn Askjeeve foor
ѕomething elsе, Αnyhow Ӏ am herе nοw anԁ would
just lke tоo say kudos fоr а marvelous post anԁ a all round thrilling blog (Ӏ аlso love the theme/design),І don’t hаve
time to read through itt all at the minute but Ι have book-marked iit аnd also included уοur RSS feeds, ѕo when I have timne I will be back to read a lot morе, Pleаse ԁo keеp up thе excellent job.
Your website offered us with valuable and paintings on .
You made an impressive activity and our whole
group can be thankful to you .
It kind of feels too complex and extremely wide for me.
I am taking a look ahead to your next submit , I’ll try to hold of it!
I simply want to mention I am just very new to blogging and seriously enjoyed this blog. Probably I’m want to bookmark your site . You actually have very good writings. Bless you for sharing with us your website.
You really make simpsons tapped out donut hack seem really
easy with your presentation but I to find this subject
be really something that I believe I would never understand.
It seems too complex and extremely extensive for me.
I’m looking forward in your next Publish!
Definitely Account that you said . Your favorite reason
seemed to be at the web simple factor to take into account of .
I tell you , i certainly annoyed same as any other people
consider think concerns just do not realize about.
Your favorite justification seemed to be on the
net simple factor to take into account of .
I tell you , i definitely annoyed same
as any other people consider think issues clear that not
know about .
You made an impressive activity and our whole
group will probably be thankful to you .
Undeniably imagine that you stated . Your favorite
justification appeared to be at the internet simple factor to be aware of.
You made an impressive job and our all the neighborhood will
thankful to you .
Undeniably imagine which you stated
. Your favorite reason appeared to be on the net
simple factor to have in mind of .
We are a flock a group of volunteers and starting a new scheme in our
community. Your website provided us with valuable and
paintings on . You have made an impressive
activity and our whole neighborhood will probably be
thankful to you .
Definitely Account that you said . Your favorite justification appeared to be
at the internet easy thing to keep in mind of .
I tell you , i certainly get annoyed same as any other people others folks
think issues clear that not understand about .
You controlled and also out on all managed to hit
the nail on the top no need side-effects , others
cAN could take a signal. Will likely be
back to get more. Thank you
If I’m using gel polish, would I just go ahead and use the gel base coat then cure over the wrap?
yes, you would apply the foundation(cure) over the wrap and continue as would doing a regular gel manicure. You may want to add a extra coat or 2 of your color (or clear) to add the thickness needed to protect the break.
What hard gel did you use?
Gelish LED clear builder gel.
Thanks for this! Great tip!
hello from sunny south ALABAMA;
I just have to chime in on repairing nails and the questions about it(lol)
first may I compliment you on your nails.
I use silk repair tabs ;yet have used tea bag; paper tape(in an emergency ie:away from my mani kit& linen repair tabs.
I find that silk repair tabs smooth out better;less filing and buffs to a glossier shine.
I use brush on nail glue;as I get more controlled application.
Also; this method as with a lot of others in the nail art business;takes practice (at least it did for me LOL)
Your site is very well done and for having children; you do great work hahahaha.
Thank you for sharing your talent.
Thanks for the tips. You have really nice nails.